 Tonight's dinner mission is something I threw together on the fly. After a busy morning helping at my daughter's school, I hadn't put a lot of thought into what I planned to have for dinner. After considering my options, I remembered I had a whole chicken in the freezer that I bought with the intention of simply roasting. So after a little bit of thinking I decided lemon, rosemary, and thyme sounded great. This is such a super simple way to season chicken that gives it a great flavor. Enjoy!
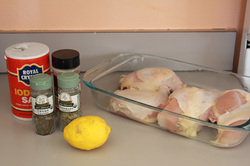
Here's what you'll need
Lemon & Herb Chicken
1 whole roasting chicken
1/2 tsp salt
1/2 tsp black pepper
1 tsp dried rosemary
1 tsp dried thyme
1 lemon
Preheat oven to 350 degrees. Cut up your chicken, rinse, and place in a 9 x 13 pan. My family never eats the wings so I reserved these with the remaining carcass in a plastic bag to use tomorrow to create my own chicken stock.
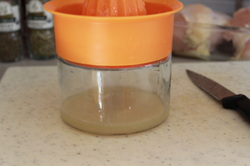
Next, cut your lemon in half and juice. I used my juicer; however, if you do not have a juicer you can use a fork to help squeeze the juice out of the lemon.
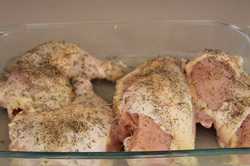
Pour your lemon juice over the chicken pieces then sprinkle with salt, pepper, rosemary, and thyme. Place in oven and bake 45 minutes to an hour or until juices run clear and internal temperature reaches 165 degrees for white meat and 180 degrees for dark meat.
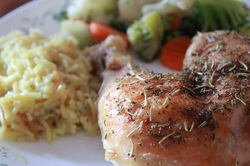
Serve with your favorite sides.
 My mission begins with what seemed like a simple and easy way to make orange chicken. My family loves Asian cuisine so when I found this recipe on SixSistersStuff.com, I couldn't wait to try it. I went through the process, following their directions step-by-step (only I doubled the sauce because of the reviews I had read); however, this one was a big disappointment and I'll explain why.
Here's what you'll need:
 Crockpot Orange Chicken
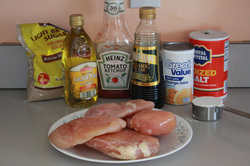
• Boneless chicken breasts, chopped into small chunks (I used about 4)
• 1/3 cup Flour
• Olive oil
• 1/2 Tbsp. Salt
• 1 tsp Balsamic Vinegar
• 3 Tbsp. Ketchup
• 6 oz. Frozen orange juice concentrate (thaw or throw it in the microwave for 45 seconds)
• 4 Tbsp. Brown Sugar

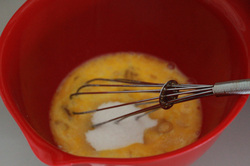
Begin by combining the thawed orange juice concentrate, brown sugar, Balsamic vinegar, salt, and ketchup in a bowl.

Whisk together to combine. Set aside.
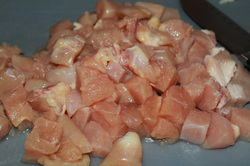
Cut up the chicken breast into small bite size chunks.
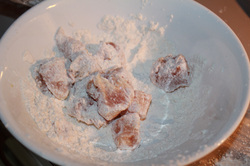
Coat chicken in flour, shaking off excess flour.

In a large sautee pan, heat olive oil. Add chicken.

Cook chicken until golden brown.

Place browned chicken in crockpot. The chicken does not have to be cooked completely as it will continuing to cook for hours.

Pour sauce mixture over chicken. Cook on low 5 to 6 hours.

This is what happened the first time I cooked this recipe following the directions as stated. I almost cried when I discovered this charcoal mess inside the crockpot.
Although my first attempt was a complete failure, I decided I really wanted to try this recipe again. I questioned if my slow cooker was cooking too hot. I had assembled this meal prior to leaving the house for the afternoon to attend my daughter's Nutcracker dance rehearsals so I had not been home to check on it. So refusing to give up completely on this recipe, I decided to give it another chance a couple of days later. Again, I followed the directions step-by-step, only this time I was home to keep an eye on the meal. I occasionally peeked in on the slow cooker and stirred the contents around periodically. After about 3 1/2 hours of cooking on low, I noticed the sauce was thickening, bubbling, and caramelizing. I decided rather than risking a repeat of the charcoal mess, I would reduce the crockpot temperature setting to warm.
 This is how everything turned out the second time around. Much more appealing to look at; however, the meat was completely overcooked. Not only was this recipe a prep work prior to placing in the crockpot, it didn't turn out well at all. I am still on a mission to find a good orange chicken recipe; however, I will not be repeating this one again.
I'm thinking I also may be in the market for a new crockpot.
MISSION: FAIL!
 Tonight's dinner mission is brought to you buy one of my family's favorite Rachael Ray recipes - Vodka Creamy Pasta. Mmmmmm. This recipe is so easy to make which is exactly what I was looking for today. I usually have all the ingredients for this one on-hand! I made a minor change to the original recipe by only using 1 shallot simply because 2 can make it over powering.
Here's what you'll need:
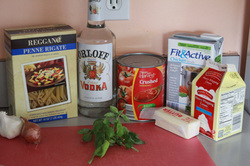
1 16 oz box of penne
1/2 cup heavy cream
1 cup vodka (I buy the cheap stuff because it's just for cooking)
1 cup chicken broth
1 28 oz can crushed tomatoes
2 cloves garlic, minced
1 shallot, minced
1/4 cup fresh basil leaves, shredded
3 Tbsp olive oil
1 Tbsp butter
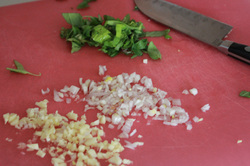 Begin by bringing water to a boil and preparing your pasta according to the manufacturers directions. While you are waiting on the water to boil, mince the garlic and shallot. Chop the basil leaves and set aside.
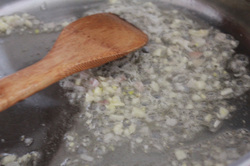 In a large sautee pan, heat olive oil and butter. Add garlic and shallots then sautee 3 to 5 minutes to bring out their sweetness.
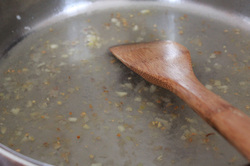 Add vodka to sautee pan, bring to a boil and simmer for 2 to 3 minutes.
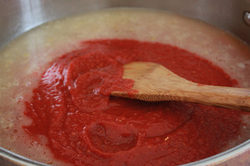 Add crushed tomatoes and chicken broth. Bring to a boil. Season with salt and pepper to taste and simmer.
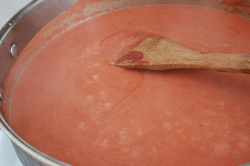 Add heavy cream and mix well.
 Add pasta to creamy tomato sauce and stir to coat.
 Top with basil and serve with your favorite bread.
MISSION: SUCCESSFUL!
 Tonight's dinner mission is quick and simple to make. My penne with Canadian bacon is inspired by Fazoli's new dish, penne with bacon. Over the summer, I had a coupon for a BOGO combo at Fazoli's so I took the kids one afternoon after a day of back-to-school shopping. This was before our "ban on eating out" was in place. I got their new dish "Penne with bacon" and my daughter asked if she could try it. Next thing I knew she was ignoring her meal and focusing her attention on mine. She has asked me to try to make my over version of it so tonight I did.
The ingredients are simple and can probably be purchased for around $5, depending on if you have anything on hand or not. I usually have extra cheese from other meals I make so this was a good way to use up those leftovers so they don't go bad.
Here's what you'll need.
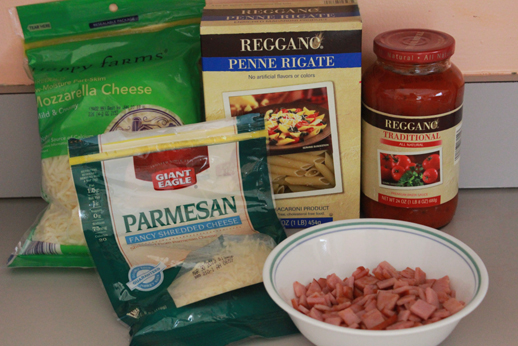
| Penne with Canadian Bacon
1 16 oz box of penne pasta
1 jar of your favorite spaghetti sauce
1 pkg Canadian bacon
1 1/2 cups Mozzarella, shredded
1/2 cup Parmesan, shredded
Preheat oven to 350 degrees. Next begin preparing your pasta according to the package directions. | | 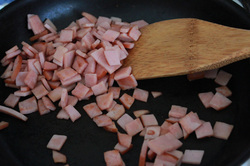
Chop up the bacon and lightly brown it in a non-stick skillet.
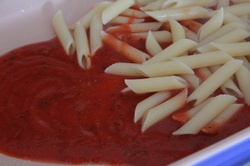
Spoon some spaghetti sauce in the bottom of a 9 x 13 baking dish.

Spread a layer of pasta in the pan and layer with bacon. Repeat until pasta and bacon are used.

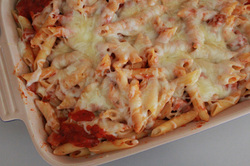
Add spaghetti sauce to pasta and stir to coat pasta.
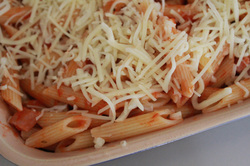
Top with cheese and bake in oven about 15 minutes or until cheese is melted.
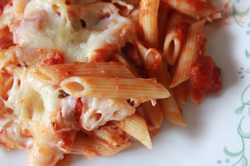 Serve with your favorite salad and bread.
MISSION: SUCCESSFUL!
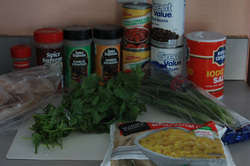 Thursday is a very busy day for me so this makes it crock pot cooking day. Today's mission was to find a delicious recipe that is easy to put together in a crock pot and forget about while I go about my day. This is a meal I found on SkinnyTaste.com and I decided to alter it a little bit. This one is super simple and makes the house smell great! Here's what you'll needSanta Fe Chicken2 15 oz cans black beans, drained and rinsed2 14 oz cans tomatoes w/green chiles 8 oz corn3 scallions1/2 cup cilantro1 1/2 tsp cumin1 1/2 tsp garlic powder1 1/2 tsp onion powder3 chicken breastSaltRice or Tortillas
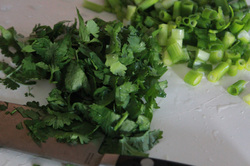 Chop cilantro and scallions.
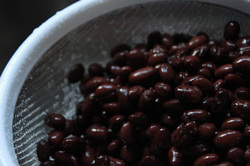 Drain and rinse black beans.
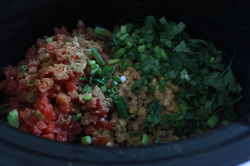 Add beans, tomatoes, corn, spices, scallions, and cilantro to crock pot.
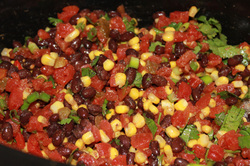 Stir to combine ingredients.
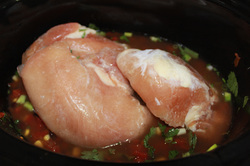 Place chicken breast on top. Cook on high 6 hours or on low for 10 hours.
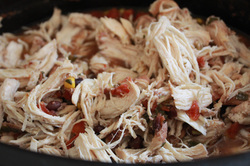 About 2 hours before meal is done, remove chicken and shred with two forks. Return shredded chicken to crock pot and continue cooking for remaining time.
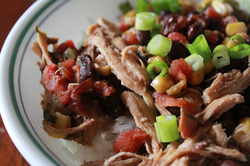 Serve over rice or you can use this as a tortilla filling.
Although this recipe is a "skinny" meal with low calories (around 190 calories a serving), for a dinner you could serve it with sour cream or cheese to give it that little extra something and it would still be wonderful.
MISSION: SUCCESSFUL!
 Today's mission finding a way to use the bananas I noticed were ripe before they go bad. So begins my mission - banana pancakes with caramel banana syrup. I ran the idea by my daughter last night and she said it sounded yummy. My internal Mommy clock decided to wake me up early so I had plenty of time to make these this morning.
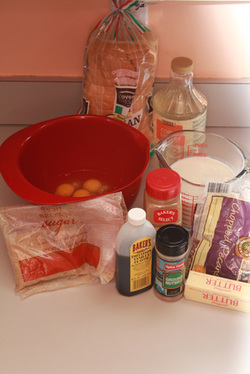
Here's what you'll need:
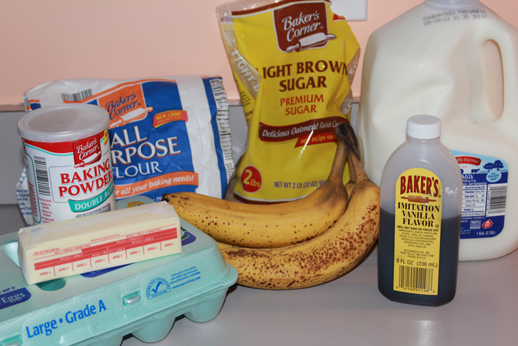
| Banana Pancakes
2 cups all-purpose flour
1 Tbsp baking powder
1 banana, ripened
1/2 cup butter, melted
2 eggs
2 cups milk
1/4 cup brown sugar
Caramel Banana Syrup
1/2 cup melted butter
1/2 cup brown sugar
2 bananas, ripened
1 tsp vanilla extract
| | 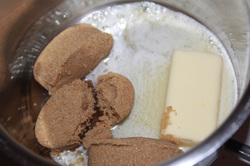 In a medium sauce pan, melt butter, vanilla extract, and brown sugar.
 Whisk brown sugar, extract, and melted butter together over medium-high heat.
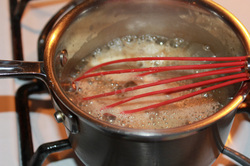 Bring to a boil. Continue to boil until sauce begins to thicken.
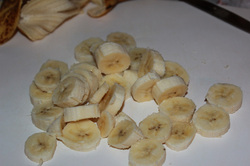 Meanwhile, slice two bananas.
 Add sliced bananas to caramel sauce. Reduce heat to low while you prepare pancake batter.
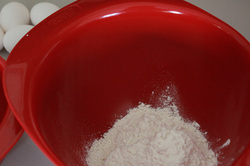
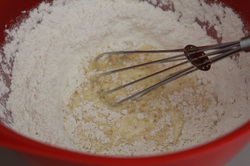
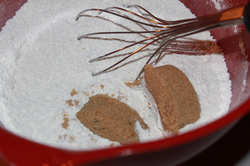 In a medium-sized bowl, combine flour, baking powder, and brown sugar.
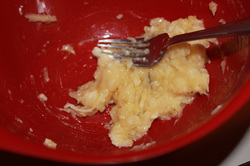 In a small bowl, mash one banana.
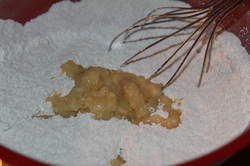 Add mashed banana to flour mixture.
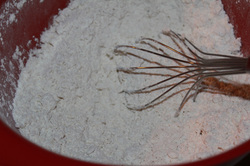 Whisk banana into flour mixture. Flour will have some texture, but should not have big lumps.
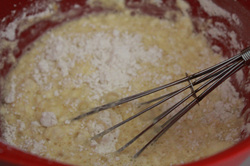
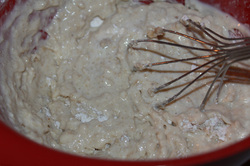 Slowly begin adding milk, melted butter, and eggs to flour mixture. Carefully whisk together to incorporate liquid.
 Add remaining liquid.
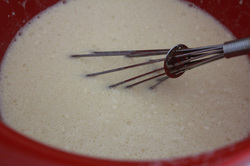
 Whisk together until liquid is completely incorporated and mostly smooth.
 Over medium heat, pour 1/4 cup of batter on griddle or non-stick pan. When bubbles form, pancakes are ready to turn.
 Continue to cook on other side another 1 to 2 minutes or until golden brown.
 Top with caramelized banana syrup and serve.
My entire family enjoyed this pancakes!
MISSION: SUCCESSFUL!
How I love three day weekends! Another morning for me to make my family a warm and delicious breakfast. Today's mission,I decided change things up from a traditional grilled french toast and try my hand experimenting with a baked french toast casserole. I will definitely make this again and may try changing things up with it too.
Here's what you'll need:
Baked French Toast Casserole
8 eggs
2 1/2 cups milk
1/2 cup heavy cream
1/4 tsp ground cinnamon
1/4 tsp ground nutmeg
1/4 cup sugar
9 slices Italian bread
Praline Topping
3/4 cup butter, softened
1 cup brown sugar
1/2 tsp ground cinnamon
1/2 tsp ground nutmeg
1/2 cup pecans, roughly chopped
3 Tbsp light corn syrup

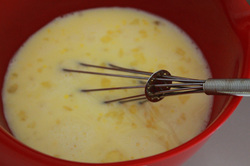
After cracking open your eggs, add cinnamon, and nutmeg to your eggs. Whisk to combine.
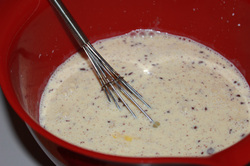
Add milk and heavy cream to your egg mixture. Whisk to combine.
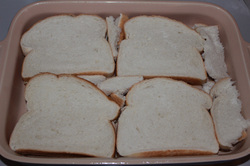
Spray 9 x 13 baking dish with cooking spray. Place bread in two layers in casserole dish, breaking up the extra piece to fill in the holes.
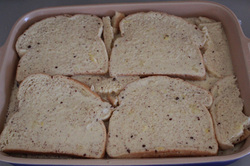
Pour egg mixture over bread, making sure each piece of bread is moistened. Refrigerate overnight if possible. If making the same day, let stand at least 10 minutes to allow bread to absorb liquids. Bake in 350 degree oven for 30 minutes.
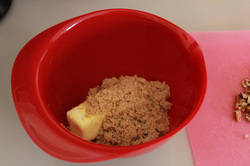
While casserole is baking, it's time to make our praline topping. Begin adding the cinnamon, nutmeg, corn syrup and brown sugar to the soften butter. Mix together until combined.

Roughly chop pecans then fold into butter mixture.

After the first 30 minutes of baking the casserole, remove from oven and spread praline mixture over top the bread. Return to oven and bake an additional 30 minutes for a soft texture. If you like a more firm texture, add 15 minutes for a total baking time of 1 hour 15 minutes.
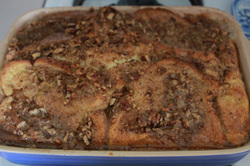
You will notice your casserole has puffed up some when you remove it from the oven.
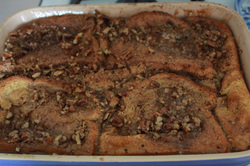 The casserole will "sink" slightly as it cools. This is normal.

Drizzle with maple syrup and serve.
MISSION: SUCCESSFUL!
 Sunday morning breakfasts are the best! I don't have to wake up super early and rush everybody around to get to school or ballet. This gives me more time to make my family a nice breakfast that isn't cereal.
For today's mission I decided to make crepes with apple filling. It's a little more involved than pancakes, but still pretty simple that I won't spend the entire morning in the kitchen. One of the best parts about crepes is that I usually have all the ingredients on hand so they don't cost a lot of money to make. Besides, it sounded great and I wanted it.
Here's what you'll need:
To make the crepes, I use the recipe from my Joy of Cooking Cook book.
Crepes with Apple Filling
1 cup all-purpose flour
1 cup milk
1/2 cup lukewarm water
4 eggs
3 Tbsp sugar
1/2 tsp salt
1/4 cup butter, melted
2 cans apple pie filling
Typically I would make my own apple filling from scratch, but I am waiting to go to the apple orchard to pick apples so I didn't buy any at the store this week.
In one bowl, combine flour and salt.
In another bowl, combine eggs and sugar. Mix until sugar is dissolved.
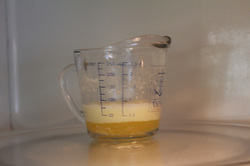
Melt 1/4 stick of butter. I do this in the microwave for about 40 seconds to a minute.
Add milk and water to egg mixture, whisk to combine.
Slowly begin to add liquid to flour mixture, whisking slowly to incorporate ingredients.
Continue to add liquid.
Once all the liquid has been added, whisk until most of the lumps are gone. Let the batter stand for about 30 minutes.
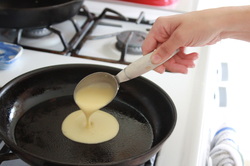
Preheat a non-stick pan on a medium-high heat. Spray lightly with cooking spray. Add approximately 1/4 cup of batter to the pan.
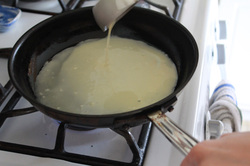
Swirl the batter around quickly around the bottom of the pan.
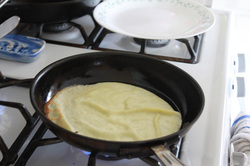
After the batter has set and is lightly browned, use a spatula to carefully flip. Try to smooth the crepe flat in the pan if any corners flip over to ensure it cooks completely. Remove from pan. Repeat process until all batter is cooked.
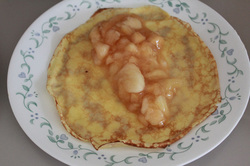
Place a crepe on a plate and spoon some apple filling down the center. You can heat the apple filling on the stove or microwave if you prefer it warm.

Carefully turn one side of the crepe over the apple filling.

Carefully overlap the other side of the crepe.

Drizzle with maple syrup and serve immediately.
MISSION: SUCCESSFUL!
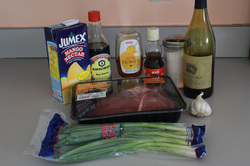 Tonight's dinner mission, try a recipe my friend from high school gave me awhile back. I love Asian cuisines so much, so when my friend, Nicole, posted that she was making bulgogi (and seemed to rave about how wonderful it tasted) I had to inquire about the recipe. It's something I'd never heard of and I was completely intrigued. With our new goal to eliminate eating out, the only way I'm going to be trying something like this is if I make it myself. So today was the day and it turned out great.
Here's what you'll need.
Bulgogi Recipe
1 lb thin sliced steak (i.e. flat iron, sirloin)
3 Tbsp Garlic, minced
3 Tbsp Soy sauce
2 Tbsp Sugar
1 Tbsp Honey
2 Tbsp Mango Juice
1 Tbsp White Wine
1 Tbsp Sesame Oil
3 Green onions, finely chopped
1 tsp black pepper
_
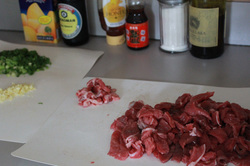
Finely chop green onions. Mince Garlic. Slice steak very thin like stir fry meat.
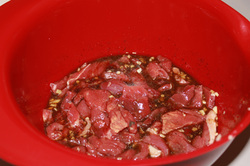 Combine all ingredients in bowl, reserving some green onions to garnish dish. Marinade beef for 2 to 3 hours. The longer you marinade the beef, the more vivid the flavor.
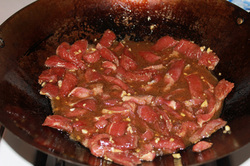 Add meat mixture and marinade to heated wok. Cook mixture, stirring occasionally as the mixture begins to boil.
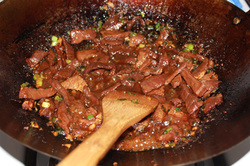 Continue to cook as the liquid begins to thicken. Continue to stir to make sure nothing is sticking to the wok.
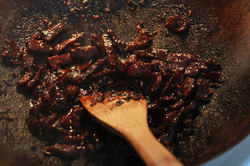 Once all the liquid has reduced and thickened, continue to cook the beef. The mixture will begin to caramelize as it cooks. You want to cook the beef until is starting to "char".
 Once your beef has caramelized and started to blacken slightly, remove from heat. Serve over a bed of rice.
MISSION: SUCCESSFUL!
 Today's lunch mission had to be quick and easy. After an early morning at the ballet studio, I'm tired and knew we still had a few errands to run. This is the weekend my husband is to install a new water faucet to replace our old one that is dripping. It's driving me crazy to see water drip out of that thing because I know it's wasteful!
With that in mind, I decided a quick hot sandwich would do the trick. Back in May, I met my husband downtown and we had a "lunch date". We decided to go to a local little hole in the wall deli and I had an incredible hot turkey sandwich that I couldn't stop thinking about. The only problem was, the sandwich cost almost $8 for one! Yikes. Way too much to do on a regular basis, so I decided I'd have to do my best to create my own version of this wonderful sandwich if I was going to have it again any time soon. The rest is history.
Here's what you'll need:
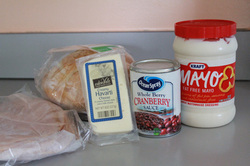
Hot Turkey Sandwich w/cranberry mayo on sourdough
1 lb smoked turkey
1 loaf sour dough bread (I used a fresh baked kind I found at Meijer)
1 block Havarti cheese ( I was thrilled to find this at Aldi for $2.99)
1 can whole cranberry sauce
1/3 cup mayo (I use the fat-free kind)
Butter or margarine for bread (optional - I used sprayable butter to mist my bread)
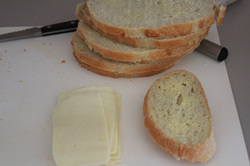 Slice the cheese and bread to desired thickness. Havarti cheese is a soft cheese so be careful.
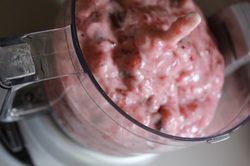 Combine mayo and cranberry sauce in a food processor (or blender)
 Puree until it reaches desired consistency. I like mine to have small bits, but not huge chunks of cranberries.
 Apply butter to outside of bread. Spread inside layer with a tablespoon (or more if you like) of cranberry mayo. Layer turkey and cheese on other slice of bread.
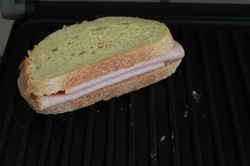 Assemble sandwich and place on panini grill. If you do not have a panini grill, you can place sandwich on a non-stick pan or outdoor grill if desired.
 Grill until nicely golden brown and cheese is melted.
MISSION: SUCCESSFUL!
|
 RSS Feed