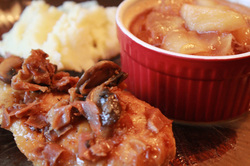
 Tonight's dinner mission is super simple and inexpensive to make - spice rubbed steaks. Our refrigerator's compressor went out so I come up with a quick meal that didn't require a lot of prep work for dinner as I'm going to have to restock the fridge soon. So the next few days I will be preparing meals that don't require a lot of ingredients just to make my life a little more easy. I knew I had sweet potatoes and zucchini on hand so I thought sirloin steaks would be quick and not too much to purchase since I had everything else already. I flipped through my America's Most Wanted Recipe book and found a copy cat "Outback Steak Seasoning" recipe which sounded great.
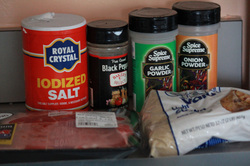
Here's what you'll need
Spice Rubbed Steaks
1 Tbsp Brown Sugar
1 tsp salt
1/2 tsp black pepper
1/2 garlic powder
1/2 onion powder
2 large sirloin steaks (cut in 2)
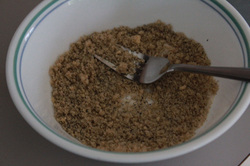
Combine all dry ingredients in a bowl and mix well.
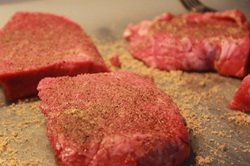
Generously spread seasoning to both sides of each steak.
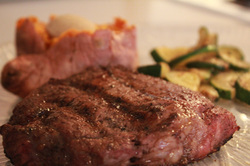
Grill or pan fry steaks to desired temperature. These are cooked medium/medium-well and were grilled for about 6 to 7 minutes on each side. Serve with your favorite sides.
This steak rub makes these steaks good enough to eat without steak sauce; however, I don't think they tasted much like Outback Steaks. They were very good; however, I have tried other copy cat recipes that tasted more like Outback and I'll share that recipe when I make it again.
MISSION: SUCCESSFUL!
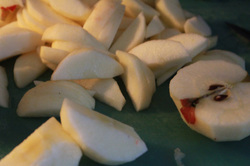
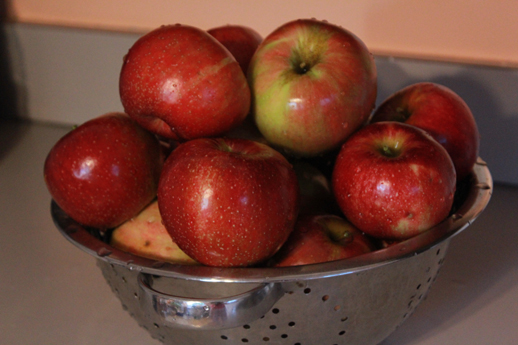
Tonight's dinner mission needed a side dish and I still have 1/2 a bushel of apples from our trip the orchard that I wanted to find a way to use up. So I decided to make cinnamon apples to serve with our main course. I threw this one together so quick I missed a few pictures (oops).
Here's what you'll need
Cinnamon Apples
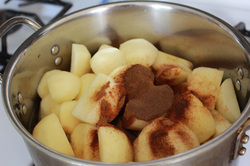
6 medium apples, peeled and sliced
1 1/2 cups water
1 cup sugar
1 1/2 tsp cinnamon
1 Tbsp corn starch
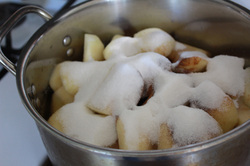
In a medium sauce pan, bring water to a boil and add sugar. Cook until sugar is dissolved. Add cinnamon and stir to mix well. Take 1 Tbsp cold water and 1 Tbsp corn starch and mix together well until corn starch is dissolved. Add to simple syrup mixture. Continue to boil.
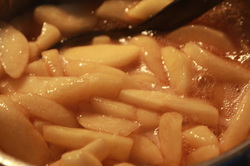
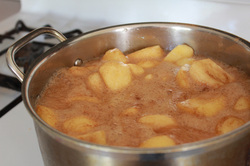
After you have peeled, cored, and sliced all the apples add them to your simple syrup mixture. Boil approximately 15 to 20 minutes or until apples have softened and syrup is thickened.
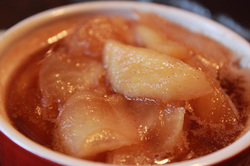
Serve warm. I used a ramekin dish to contain the syrup :o)
MISSION: SUCCESSFUL!
Today's mission was to use my baby portabella mushrooms before they went bad! One thing I've found that I dislike doing is throwing away food. So Chicken Marsala was the dinner of choice to use the mushrooms up.
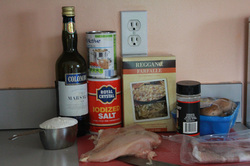 Here's what you'll need
Chicken Marsala
2 chicken breasts (one inch thick)
8 oz baby portabellas
1 cup flour
1/4 lb prosciutto sliced paper thin
3/4 cup chicken broth
2/3 cup Sweet Marsala wine
1 tsp ground black pepper
1 1/2 tsp salt
2 Tbsp butter
3 Tbsp olive oil
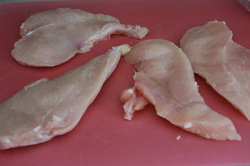
Begin by using a knife to filet the chicken breasts into four pieces.
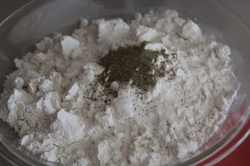
In a shallow dish, combine flour, salt, and pepper. Mix well to distribute seasonings evenly.
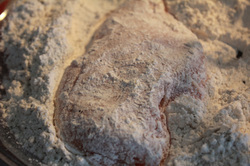
Dredge chicken breasts in flour. Shake off excess flour.

In a skillet, heat 3 Tbsp olive oil. Place chicken in preheated pan and brown on both sides approximately 3 minutes. When golden brown, remove from pan, set aside, and keep warm.
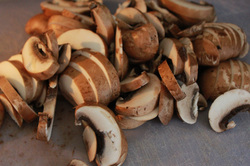
While chicken is browning, wash, remove the stems, and slice the mushrooms. Set aside.
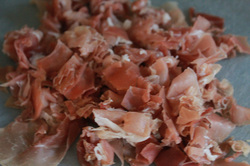
Chop prosciutto.
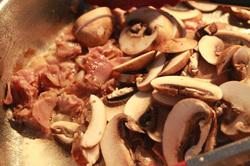
In the same pan you cooked the chicken, melt the butter. Add the prosciutto and mushrooms and sautee until mushrooms are soft.
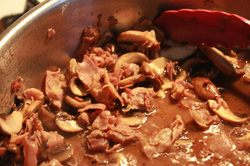
Add Marsala wine and cook 2 minutes until reduced to half. Add chicken stock. Be sure to scrape the bottom of the pan to loosen brown bits for additional flavor.
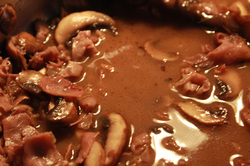
Simmer until sauce begins to thicken.
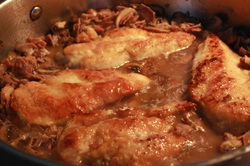
Return chicken breast to pan, bring sauce to simmer, and cover for 15 minutes on medium-low heat.
MISSION: SUCCESSFUL!
 Tonight's mission was to try to replicate one of my restaurant favorites, Penne Rosa. My daughter is a pasta lover and I'm always looking for a new way to sneak a few healthy vegetables in her - pasta always seems to work. Penne Rosa is one of my favorites; however, the thrifty person in me determined that it costs a little more than the price of one regular serving to make this at home for four people if I have some of the the ingredients on hand.in my pantry I did a little research online to try to find a recipe that sounded like it would be similar and found a lot of them were using canned "Italian diced tomatoes". If you cannot find quality fresh tomatoes, you could substitute the fresh for canned; however, Noodles & Co. uses fresh and I wanted this to really replicated it as close as possible.
Here's what you'll need.
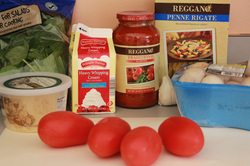 Penne Rosa
1 lb penne
2 Tbsp Olive Oil
4 Roma tomatoes
1 clove garlic, minced
16 oz button mushrooms
3/4 cup heavy cream
1 cup marinara sauce
1/2 cup white wine
3 cups fresh spinach
1/4 cup Parmesan, grated
1/2 to 1 tsp crushed red pepper flakes
Begin by preparing your pasta according to manufacturers recommended directions.
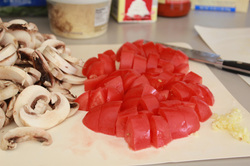
While you are waiting on your water to boil for your pasta, prepare your vegetables. Wash your tomatoes. With a clean damp towel, gently brush your mushrooms clean. Dice the tomatoes, slice the mushrooms, and mince the garlic.
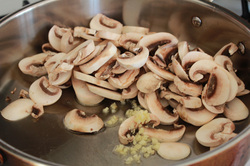
In a sautee pan, add olive oil to coat so everything doesn't stick. Add the mushrooms and garlic to the pan and sautee.
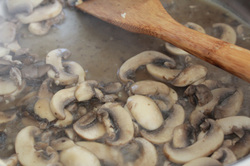
After the mushrooms are sauteed, add white wine and simmer 2 to 3 minutes until wine reduces to 1/2.
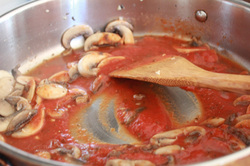
Add marinara sauce.
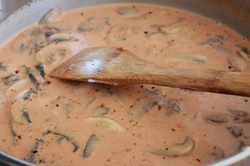 Add heavy cream and crushed red pepper flakes, stir to combine.
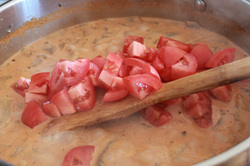
Add diced tomatoes.
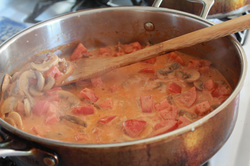
This is what the sauce should look like once everything has been added.
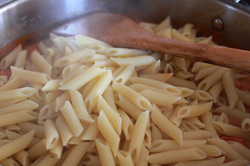
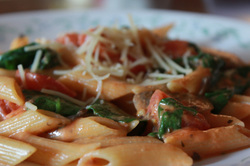
After you have cooked your pasta, add it to the sauce and stir to combine.
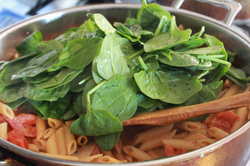
Add the spinach and stir well to distribute the vegetables evenly throughout the pasta. All the pasta to begin to wilt slightly before removing from heat and serving.

Top with grated Parmesan cheese and serve immediately.
MISSION: SUCCESSFUL!
 Another busy day, another need for an easy meal that I can have cooking while I go about my daily tasks. For some people, fall means football season, but for our family it is ballet season as our daughter prepares for her parts in our studios Nutcracker production. This means spending about 4 hours at the studio and doesn't give me a lot of time to spend in the kitchen preparing meals. Today's dinner mission was to put together a crock pot meal for lunch that could cook while I once again shuttled my daughter off to early morning ballet class. Usually I make this on the stove top, but today I knew I wouldn't have a lot of time to cook lunch so I decided to see how my chili would turn out in the crock pot.
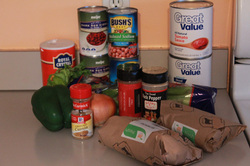
Here's what you'll need.
Chili
2 lbs ground beef
1 green pepper, diced
1 onion, diced
1 celery stalk, diced
1 28 oz can of tomato sauce
2 14.5 oz cans kidney beans
2 14.5 oz cans pinto beans
2 14.5 oz cans diced tomatoes
1 1/2 tsp black pepper
3 Tbsp chili powder
2 tsp salt
2 tsp cumin
2 cups water
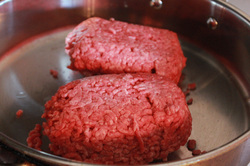 Place your ground beef in a large skillet and cook on medium high heat.
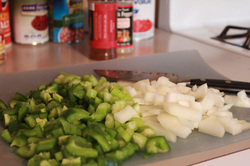 While your beef is browning, dice your vegetables.
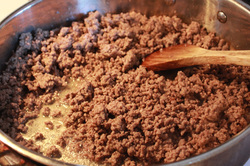 Once the beef is browned, set aside.
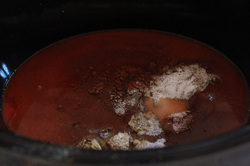 In your crock pot, add tomato sauce and seasonings. Stir to mix well so the spices will be distributed evenly throughout the chili.
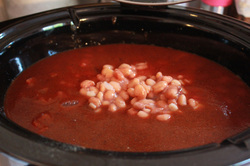 Add beans and diced tomatoes to sauce.
 Once the beef is browned, add it and the diced vegetables to the crock pot. Cook 3 to 4 hours on low. The beef is already cooked, so the goal is to heat the remaining ingredients. This is one of those recipes that gets better the longer is cooks. This chili is even better if served a few days after you cook it when the seasonings have had time to become more vivid in flavor.
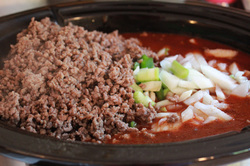
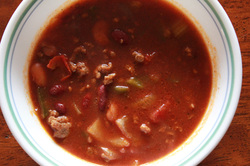 Serve with your favorite toppings (i.e. sour cream, cheese, scallions) and crackers or corn bread.
MISSION: SUCCESSFUL!
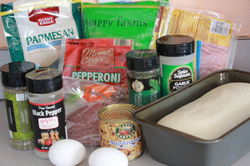 Tonight's dinner mission, Stromboli. The basics for this recipe were given to me by a former co-worker at least 10 years ago. I haven't made this in ages and I don't know why because it is fantastic. Everyone loved it!
You can get creative with this one too. Add a variety your favorite meats and veggies to make it have even more flare.
Here's what you'll need
Stromboli
1 loaf white bread dough (the type you find in the freezer section of your home), thawed and allowed to rise
2 eggs, separated
1 4 oz can mushrooms
Pepperoni
Ham
Hard salami
3/4 cup mozerella
1 Tbsp Parmesan, grated
1 tsp Parsley
1/2 tsp Garlic Powder
1/4 tsp Black Pepper, ground
1 tsp Oregano
2 Tbsp cooking oil
Pizza sauce
To prepare this meal, you will need to take your frozen loaf of bread dough out of the freezer and thaw according to manufacturer's recommendations. Allow the dough to rise accordingly before preparing stromboli.
Preheat oven to 350 degrees.
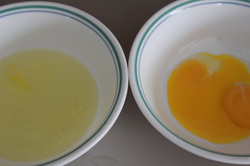
In two bowls, separate egg whites and yolks. Set aside egg whites.
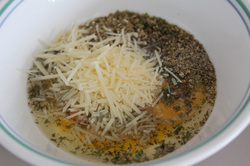
Add cooking oil, Parmesan, black pepper, oregano, garlic powder, and parsley to egg yolks. Mix well and set aside.
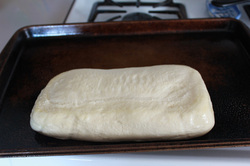
Once dough has risen, turn out onto greased baking sheet.
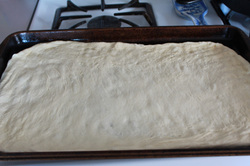
Press dough to edges of baking sheet with fingers.
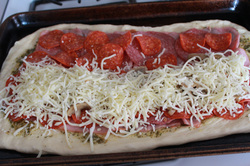
Spread egg and seasoning mixture over the surface of the dough, then top with desired meats and mushrooms. Top only half the Stromboli with cheese (see example)
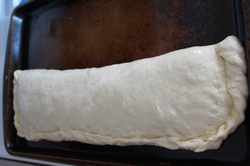
Carefully fold the half of the Stromboli with the meat only over top the other side. Press the edges of the dough together to form a seal, the gently fold edges over to help create a seal and press. Brush the top of the dough with egg whites.
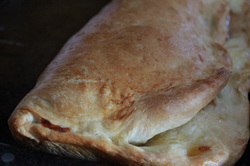
Bake for 30 to 40 minutes or until dough is golden brown.

Cut into 3 inch wide slices and serve with your favorite pizza sauce.
MISSION: SUCCESSFUL!
 Today's dinner mission is brought to you by my husband's birthday dinner request - spaghetti with olives. Several years ago I discovered this recipe by Giada De Laurentiis on Food Network's web site. My husband has said this is easily, hands down, his favorite spaghetti recipe.
Here's what you'll need
Spaghetti with Olives
1 lb spaghetti
1/4 cup olive oil
1 1/4 cups kalamata olives
1/2 Tbsp red pepper flakes, plus more if desired
3 cups tomato sauce, recipe follows
1/2 cup grated Parmesan
1/2 cup basil leaves, shredded
Spaghetti Sauce
1/2 cup extra-virgin olive oil
1 onion, chopped
2 cloves garlic, chopped
1 stalk celery, chopped
1 carrot, chopped
Salt and black pepper
2 (32-ounce) cans crushed tomatoes
2 dried bay leaves
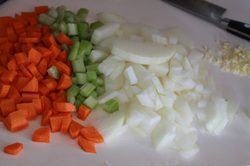 Begin by dicing all your vegetables so they are ready as you need them.
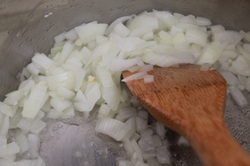 Add onions and garlic to sautee pan and cook until translucent, about 5 minutes.
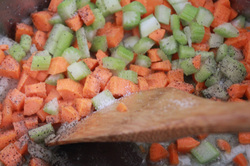 Add carrots and celery to onions and garlic, season with salt and pepper. Cook 5 to 10 minutes, until vegetables have softened.
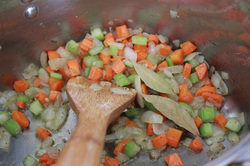 After your vegetables have softened, add your bay leaves.
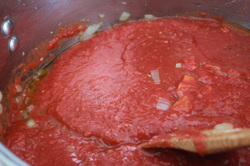 Add crushed tomatoes to sauce. Cook uncovered 1 to 1 1/2 hours. Once sauce has thickened, remove bay leaves and check for seasoning. Remove 1/2 the sauce and place in a food processor to blend until smooth. I have a hand blender, so instead of dragging out my food processor for this I used the hand blender to blend it until smooth.
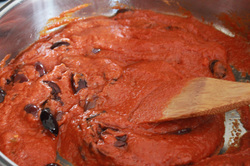 In a separate pan, prepare the spaghetti according to manufacturers recommendations. In a large skillet, add a few tablespoons of oil and sautee your olives. Add 3 cups of your tomato sauce to the pan and heat thoroughly.
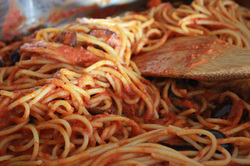 Once your spaghetti is cooked, add it to the sauce and toss to coat. If need, add some pasta water to help thin sauce slightly.
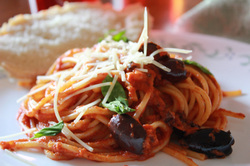 Top with fresh basil leaves and Parmesan cheese. Serve with your favorite bread.
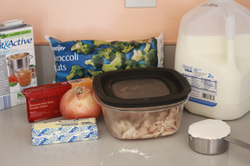 Tonight's dinner mission is another thing I threw together on the fly. Like a silly person I got wrapped up in making apple butter today and forgot to start the dinner I planned in the crockpot. My goal was to use up the leftover chicken from last night's dinner. Thankfully, I keep a well stocked freezer and pantry so I had the right ingredients to make my chicken, broccoli, cheddar soup. What I really love about this soup besides how it tastes is that this is one of the few ways I can get my daughter to eat broccoli!
Here's what you'll need
Chicken Broccoli Cheddar Soup
1 stick of butter
3 cups chicken broth
12 oz sharp cheddar cheese
2 cups of chopped broccoli, fresh or frozen
1/3 cup flour
1 onion, diced
4 cups milk
2 to 3 cups of chicken(I used my leftovers from my Lemon, Rosemary, Thyme roasted chicken)
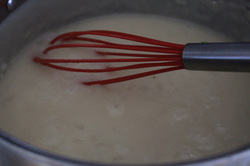
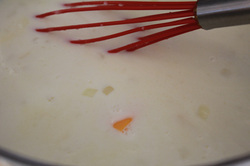
Begin by melting your stick of butter in a stockpot. Add your diced onions (oops, I forgot to photograph this part because I went into auto-pilot cooking mode), and cook until translucent. Add flour to create a roue. Mix together and begin to gradually add chicken stock, whisking as you add this to create a thick sauce.
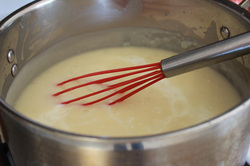
Continue to add the remaining chicken stock then incorporate the milk and simmer.
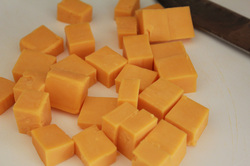
Cut your cheese up in cubes to make it melt faster.
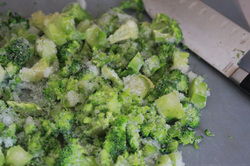
Chop your broccoli. I used frozen and quickly ran my knife through it to create smaller bite size pieces.
Add the chicken to the roue mixture.
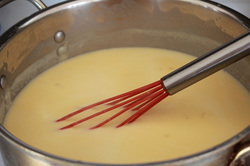
Slowly whisk the cheese into the sauce as it is melting.
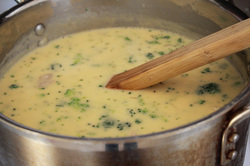
Add the broccoli and chicken.
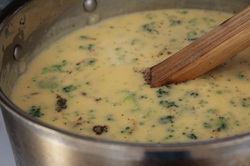
Season with salt and pepper to taste. Simmer 10 minutes.
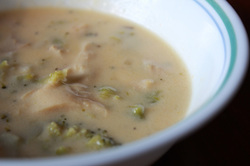
Serve immediately.
MISSION: SUCCESSFUL!
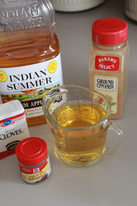
 One of my favorite things about fall is the food! Today's mission is to continue to make use of the apples I picked with my family. Today I made apple butter. My house smelled heavenly with the aroma of apples and spice. I thought I'd share with you the process I used to make this delicious spread.
Here's what you'll need
| Apple Butter
4 1/2 lbs of Jonathan apples
3 cups apple juice
2 cups sugar
1 1/2 tsp cinnamon
1/2 tsp all-spice
1/2 tsp ground cloves
| | | 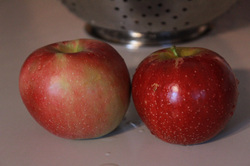
First begin by washing your apples. I use a vinegar/water solution and a vegetable brush to remove all residue from the apples (The apple on the left is before I washed it in my vinegar/water solution, the apple on the right is after).
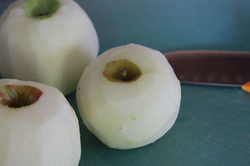
After all your apples are clean, use a vegetable peeler or paring knife to remove the skins.
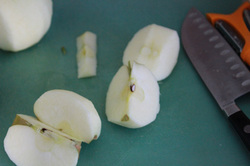
Cut the apples into quarters. With a knife, slice the quartered piece at an angle to remove the core.
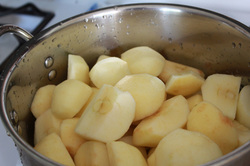
Rinse apples and place in a large stock pot.
Add apple juice and spices to apples.
Add sugar.
Cook on medium high and simmer for about half an hour or until apples are soft.
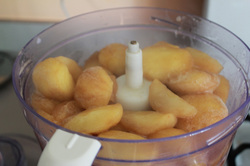
Scoop apples out of sugar mixture and place in a food processor.
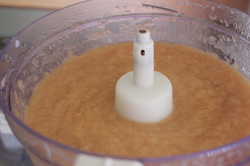
Puree apples until smooth.

Return apples to stockpot with sugar mixture.

Bring to a boil, reduce heat to low and simmer approximately 2 hours. Cooking time may vary.
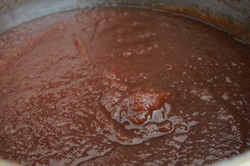
The apple butter will be rich brown in color and mounds on the back of a spoon when it is ready.
Stay tuned. I will be posting information on how to can apple butter soon!
MISSION: SUCCESSFUL!
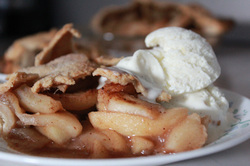 With a bushel of apples sitting in my kitchen, my mission today was to make use of some of them. I have so many plans for these gorgeous apples; however, after a spending a morning volunteering in my daughter's classroom, my time was limited. With that I decided it was a good day to make homemade apple pie! Plus we still have some homemade vanilla ice cream in the freezer so it's apple pie a la mode tonight! Of course, I'm always looking for a new recipe to try so I quickly Googled "apple pie recipe" and found one produced by Land O' Lakes butter. The reviews were good and I was intrigued because of the spices added to the crust. So off to work I went.
 Here's what you'll need:
Crust
2 cups all-purpose flour
1 tsp sugar
1/4 tsp salt
1/4 tsp ground cinnamon
1/4 tsp ground nutmeg
1/3 cup cold butter, cut into chunks
1/3 cup shortening
4 to 5 tablespoons cold water
Filling
1/2 cup sugar
1/4 cup firmly packed brown sugar
1/4 cup all-purpose flour
1/2 tsp ground cinnamon
1/2 tsp ground nutmeg
6 medium (6 cups) tart cooking apples, peeled, sliced - I used Jonathan apples we picked at the orchard.
1/4-inch1 tablespoon butter
1 tsp sugar
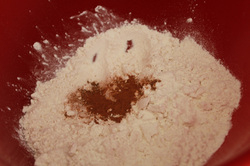
Preheat oven to 400 degrees. Combine flour, salt, cinnamon, nutmeg, and sugar in a medium bowl. Mix well.
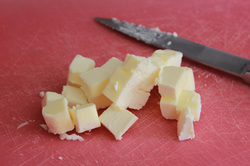
Cube the butter. This makes it easier to mix into the dry ingredients.
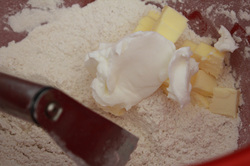
Cut the shortening and butter into dry mix using a pastry cutter or two knives.
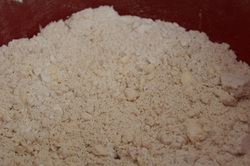
The mixture will become more coarse in texture. At this point, begin adding the ice water to the dry mix.
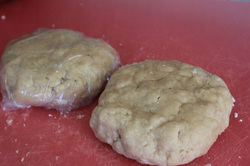
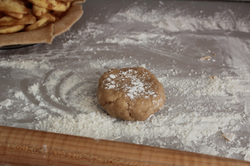
Mix the dough together and divide to form two balls. Wrap one ball in plastic wrap and place in the refrigerator.

On a floured surface, roll out the second ball of dough into a 12 inch circle. Wrap the dough gently around your rolling pin and move to your pie plate.
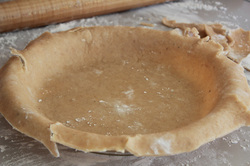
Unroll the dough from your rolling pin and gently move the dough around so it is filling the pie plate. Trim the edges to about 1/2 inch.
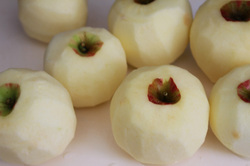
Now it's time to work on the filling. Begin by washing and peeling your apples. I use a knife to core and slice the apples. First I cut the apples into quarters, then I cut the core out at an angle before slicing the apple flesh.
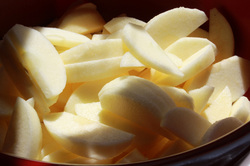
In a large bowl combine sugar, flour, cinnamon, and nutmeg. Mix well then add apples.
Stir the apples to coat with the sugary mix.
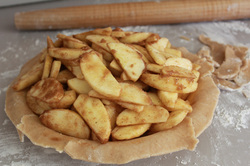
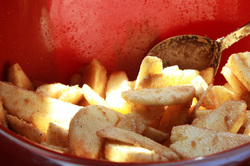
Carefully place the apply filling inside the pie crust.
Remove the second ball of dough from the refrigerator and place on a floured surface. Roll out to a 12 inch circle. Wrap the dough around the rolling pin and move to the top of your filling. Carefully unroll the top crust to the top of the pie.
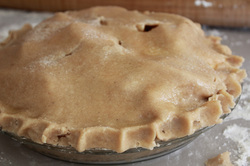
Crimp the edges to seal the crusts together. Cut 5 slits in the top of the crust. Melt 1 tablespoon of butter and use a pastry brush to brush on the top layer of the pie crust. Sprinkle with one teaspoon of sugar.
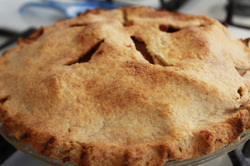
Wrap pie edges in foil and bake for 35 minutes. Remove foil and continue baking an additional 10 to 20 minutes or until the crust is golden brown and filling is bubbly. Remove from oven and cool at least 30 minutes.
Store in the refrigerator!
|
 RSS Feed